Featured Post

'Jambons'

I don't know if 'Jambons' are only available in Ireland, but they are a very popular hot snack here. Puff/flakey pastry squares ...

6.9.13

Mint Chocolate Brownies

Brownies!

I promised to put the mint chocolate brownies on the blog and here they are!
I used Tesco "Dark Chocolate Mint Thins"  which are a bit like "After Eights" .
Both of which work really well.
I have used 100g of walnuts or pecans or grated beetroot or white chocolate chips in stead of the mints. To make various sorts of brownies.
This recipe also works perfectly with gluten free flour too.

 
Folding in the mints!

 Mint Chocolate Brownies

100 g butter
100 g dark chocolate
225 g caster sugar
100 g plain flour
1 level tsp of baking powder

2 eggs
100g wafer thin mints (After Eights)

Set the oven to GM 4, 150˚C.
Line a 20 by 30 cm baking tin with baking parchment.
Break up the dark chocolate into a bowl and add the butter. Put the bowl into a pot with 4 cm of hot water in it and put the pot onto a low heat. When the chocolate has melted, take the bowl off the heat and sift in the flour and baking powder.
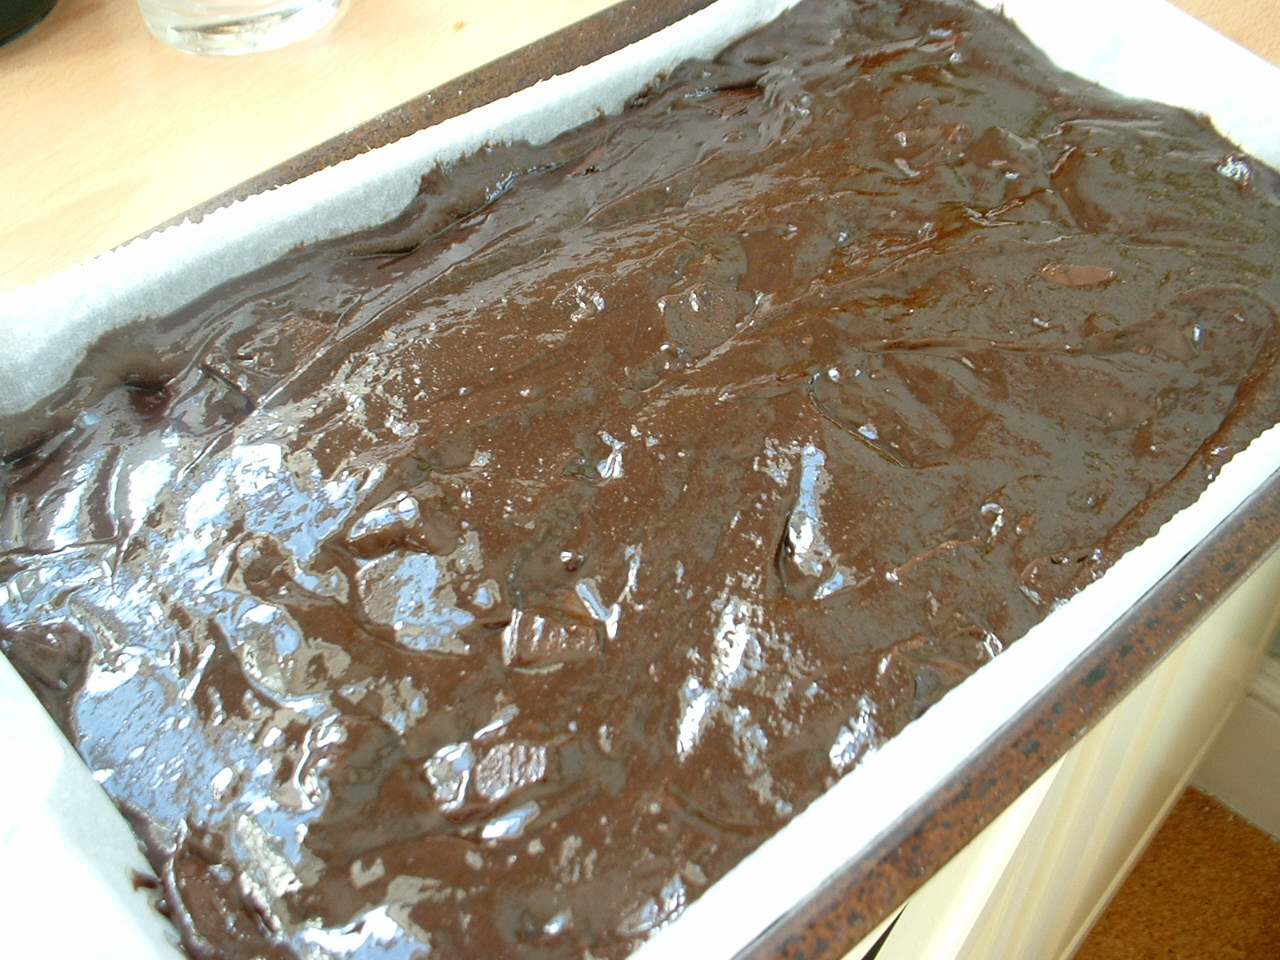
Add the sugar, eggs and broken up mints. Stir them together to mix well and spoon into the baking tin and bake for 30 minutes.
Let them cool in the tin for 10 minutes and cut them into squares and finish cooling on a wire rack.


Ready for the oven.

2.9.13

Spicing it up at Ballymaloe

      Yesterday was a beautiful late Summer's day and I was lucky to spend it at the Ballymaloe Fest  My husband Tom and I had been asked to give a talk on growing and cooking stuff from out garden. As we, and most people who grow veg have an abundance of courgettes at the moment we thought that using them would be useful.
     
     There was some discussion as to whether we were making pakoras or bhajis, but we found an expert who explained the difference. Bhajis are larger, round and mainly onion.
     We used a brand of curry powder which we like, but do play around with the spicing until you find a mixture that you like. If you are looking for spices have a look at our local spice company Green Saffron 

Spicy Sesame Salad 
  This salad is a favourite of ours, we sometimes have it as an accompaniment or we will add noodles and a some spicy grilled meat to make a main course of it.


Dressing
1tsp soy sauce
1tsp nam pla/fish sauce
juice of half a lime or 1tbs rice or cider vinegar
1cm piece of ginger grated
1 clove of garlic grated
½ a chilli chopped
1tbs sesame oil
4tbs sunflower oil

Salad
3tbs sesame seeds
4 handfuls of rocket
4 handful coriander leaves
12 large basil leaves
20 mint leaves
½ a cucumber
3 scallions or a shallot

To make the dressing put the soy sauce, nam pla/fish sauce, lime juice, grated ginger, crushed garlic and chopped chilli* into a screw top jar. Put the lid on the jar and give it a good shake. Add the oils to the jar and cover and shake well again.
Toast the sesame seeds on a dry pan until darker and beginning to release their aroma, leave to cool.
Wash the rocket and coriander and put them in to a large bowl.
Tear the basil leaves and finely slice the mint leaves and add them to the bowl.
Using a julienne peeler or a swivel peeler shred the half cucumber.
Trim and slice the scallions or shallot and add to the salad.
Mix together the salad and add the dressing and the toasted sesame seeds. Taste, season and serve.
*If you don't want the full spiciness of the chilli just put a slice of chilli into the dressing jar and bruise it with the blunt end of a wooden spoon and shake the dressing well and remove the slice of chilli before serving.


Courgette Pakoras

The amount of chickpea flour you need depends on how watery the courgettes are.
2-3 courgettes
1 onion
0.5cm ginger
1 large clove of garlic
2-3tsp curry powder
3-4tbs chickpea flour also called gram flour
salt & pepper
vegetable oil for deep frying

Grate the courgettes into a bowl. Peel the onion ginger and garlic and grate them into the bowl onto the courgettes.
Sprinkle on the curry powder, using as much or as little as you feel like. Stir well.
Sprinkle 3 tablespoons of chickpea flour and mix it in add some salt and pepper. The mixture should be fairly thick. If it isn't add more chickpea flour until it is.
Heat a pan with about 5cm of oil in it.
Test the oil with a cube of bread to see if it is hot enough. When it is cook dessert spoonfuls of the pakora mixture in it until golden.
Drain them on kitchen paper and serve with a cucumber raita. 
If you fancy some more heat, use a hot curry powder and add a finely chopped chilli.


7.8.13

Chocolate Crunch! circa 2013!

-->
Chocolate biscuit cake

150g milk chocolate
150g dark chocolate
150g butter
2tbs golden syrup
250g rich tea biscuits
12 marshmallows

Line a 30cmx18cm Swiss roll tin with baking parchment.
Break the chocolate into pieces and put them into a glass or metal bowl.
Put 6 cm of hot water in to a saucepan, put the saucepan on to a low heat and place the bowl on top.
Stir the chocolate, butter and syrup until they have melted together. Turn off the heat.
Put the biscuits into a plastic bowl and crush them with a rolling pin, not too fine leave some large pieces.
Stir the broken biscuits and marshmallows into the melted chocolate mix.
Pour the mixture into the Swiss roll tin and smooth the mixture out to fill the tin.
 Decorate with 50g of melted dark, 50g of melted milk & 50g of melted white chocolate a la Jackson Pollock!
Chill till cold and cut into slices.


Add the butter cut into chunks and the golden syrup. 

Put 6 cm of hot water in to a saucepan, put the saucepan on to a low heat and place the bowl on top.
Stir the chocolate, butter and syrup until they have melted together. Turn off the heat.


Stir the broken biscuits and marshmallows into the melted chocolate mix.
Pour the mixture into the Swiss roll tin and smooth the mixture out to fill the tin.

Stir the broken biscuits and marshmallows into the melted chocolate mix.
Pour the mixture into the Swiss roll tin and smooth the mixture out to fill the tin.


Slightly out of focus!


 Decorate with 50g of melted dark, 50g of melted milk & 50g of melted white chocolate a la Jackson Pollock!
Chill till cold and cut into slices! 

23.6.13

Roll on Summer!

               I made these bread rolls today as an experiment for the Cookery Camps I'll be teaching over the Summer. They are soft 'White Dinner Rolls'. Great with soup, salads or as a breakfast roll.

 
Last of the rolls!


Sesame Bread Rolls

350g plain flour
1 sachet fast action yeast
200ml warm water
1tsp salt
2tbs olive oil
1tbs vegetable oil
beaten egg
1tbs sesame seeds

Sift the flour into a bowl and add the yeast from the sachet.
Dissolve the salt in the warm water and add to the flour and yeast. Add the olive oil and mix it all together to make a dough.
Knead the dough on the table, dust the table with flour if the dough is sticky.
Knead the dough until smooth and springy.
Coat the dough in the vegetable oil and place in the bowl. Cover the bowl with cling film and put in a warm place for 30-45 minutes until doubled in size.
Grease a Swiss roll tin.
Take the dough out and knead again until springy. Divide into 8 or 9 pieces and shape them into rolls, place them onto a Swiss roll tin, leaving space in between them.
Cover with cling film and a tea towel and put them back into the warm place for 30 minutes, until they get bigger and start to touch each other.
Heat the oven to 220˚C, GM 7.
Take the tea towel and film off the rolls, brush the rolls with egg wash and sprinkle on the sesame seeds.
Bake in the hot oven for 20-25 minutes.They will be golden and will sound hollow when wrapped with a knuckle underneath. Cool on a wire rack.

18.6.13

Waste not want not!

       The first of the summer peas are the sweetest, long waited for and very special. Podding them takes time, but it is one job where you have to sit and do it. A cup of tea and someone to help you is pleasant. Or with a glass of wine while someone else prepares the rest of the meal is an excellent way to relax at the end of the working day. Even better & the sun shines and you can sit outside.
     
      As the pile of pods grows the small mound of peas grows too. The mound of peas seems disappointingly small compared to the pile of pods.
      When the peas are cooked and enjoyed, so sweet, so tasty, so quickly gone.
The pile of pods remains. Compost? Give them to the horses or hens?
Or soup?

      Pea-pod soup has a long and honourable history amongst thrifty cooks and it has a sweet refreshing flavour. The mint helps cut the sweetness.
      You can skip the blending part of the recipe, but you must strain the soup through the 'mouli' or a sieve or it becomes a very high fiber soup!
      I've always wondered why we 'eat' soup even though it is a liquid!

 
Pea-pods

                                                       Pea Pod Soup                                                                                    
1 onion chopped
1 stick of celery chopped
1 small clove of garlic chopped
large knob of butter
1 med potato peeled & chopped small
300g pea-pods
3 sprigs of mint
Pepper & salt
1l stock
Whipped cream & chopped mint to serve


Chopped garlic, onion & celery


Chopped potato, mint and stock

Heat the butter in a saucepan over a medium heat and soften the onion celery and garlic in it.
Add the potato, pea-pods, mint and the stock and bring to the boil.
Taste the stock and season with pepper and salt. Turn the heat down and simmer until the pods are soft and the potato cooked, about 10 - 15 minutes.


Simmered!

Turn the heat off and leave till cool enough to blend in a processor or with a stick blender. Blend and then put through a 'mouli' or a sieve, return to a clean pan and reheat.
Serve topped with a dollop of whipped cream and a sprinkle of chopped mint. 


A plate of soup for eating

12.6.13

Finding a box of memories.

        When I was growing up in the kitchen drawer there was a knife known as "The knife"!
It had been a carbon steel dinner knife, but over the years it had been sharpened so much the blade had worn away to about 3 inches. It was very easy to sharpen and when just sharpened you could have shaved with it.
        I had forgotten about it until the other week when I was passing a local second hand shop. There were some boxes outside and one was marked everything '50c'! How could I resist a rummage? So I delved in and found an old carving fork, a carbon steel bread knife with the word "Bread" carved into the handle similar to one that we'd had at home, and then down at the bottom of the box I spotted a bone handle and a blade that looked very familiar. It was a "The knife"!
         Lots of memories came flooding back of home, learning to cook and the wonderful Delia who helped Mum and was always there too. 
         I brought the three pieces into the shop and happily handed over my €1.50.
I've given the three of them a good clean and now the have pride of place in my kitchen drawer.
                                           Did "The knife" sharpen up well? Yes!

"The Knife mark 2"

12.5.13

Cucumber Pickle

Sugar, vinegar, onion, cucumber and salt. All you need for this pickle.

Mary's Cucumber Pickle
Mary works with me in my day job and is a keen gardener growing lots of vegetables with her husband in their garden and poly-tunnel. This pickle is one of her ways of making the cucumbers last longer. It is great with cold meat and salad or with oily fish such as salmon or mackerel.

3 cucumbers
1 large onion
¾ a cup of white wine vinegar
1 ½ cups sugar
2tbs salt

If the skins on the cucumbers are very tough peel them. Slice the cucumbers into rounds or using a swivel peeler shred them into long thin ribbons, discarding the seeds if they are very watery.
Peel and slice the onion very thinly.
In a large bowl mix together the vinegar, sugar and salt add the cucumber and onion.
Stir everything round to mix well. Cover the bowl and leave overnight in the fridge.
Pack into clean sterilised jars the next day sharing out the pickle between the jars.
This pickle will keep for up to 6 months in the fridge.


This is what it looks like 6 months later.